
 Facebook
 Twitter
 Pinterest
 Copy Link
Extend the Life of your Roof


Your roof is one of the most important and expensive assets of your home, but no other element is quite as valuable. While the average lifespan of a roof is about 15 years, careful homeowners can extend the life of their homes without enduring too many hardships. Take a look at these three quick maintenance tips to help your roof last.
Keep Your Gutters Clear
Debris that accumulates and clogs your gutters adds extra weight and pulls at your roof’s fascia, which can be a costly fix. Look down the length of your roof for any signs of sagging or bending – that’s a sure sign your gutters are carrying too much weight and pulling at your roof.
Don’t forget the downspouts either, and don’t be fooled by easy-flowing water. Moss and algae buildup on and around your roof can slowly eat away at your roofing material and severely compromise its integrity.
Focus On The Attic
The exterior of your roof isn’t the only area you should focus on as your attic is your roof’s first line of defense against damage with a two-pronged approach: insulation and ventilation.
Insulating your attic has the double benefit of keeping your home’s internal temperature consistent while also preventing vapor and moisture buildup on the underside of your roof. When combined with proper ventilation your attic can stay dry and keep your roof’s rafters safe from moisture damage.
A great way to keep properly ventilate is to add a fan or dehumidifier to the attic.
Catch Problems Early
Check on your roof regularly, an easy time to remember to check is with every change of the season, or after a significant storm. Catching small issues early on will save you money in the long run, so utilizing the services of a reliable, professional roofer is an invaluable asset. As with any working professional, it’s a good idea to establish a working relationship with a roofer and even consider scheduling a yearly checkup for your roof just to make sure there aren’t any problems sneaking up on you. After all, spending a little each year to maintain your roof is a lot better than dropping $15,000-$50,000 on a new one, right?
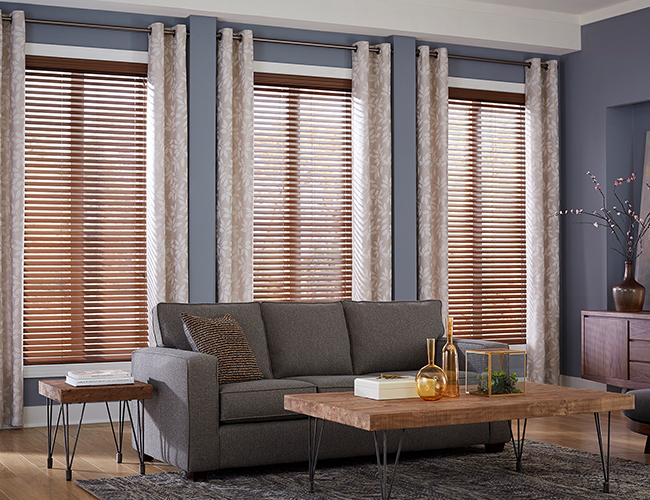
Blinds or Curtains? Or Both? Top Things to Consider When Choosing Your Window Style
Posted in Living by Kenady Swan

Some rooms just need blinds, other rooms just need curtains, and then some rooms look best with both. But how do you decide which rooms need what? There are a number of factors to consider when you’re picking window treatments for rooms in your house, from price to insulation to style to orientation within the room.
Price
Adding a combination of blinds and curtains on your windows may seem like the best idea for almost any room in your home. But that can get pricey. Basically, you’re doubling up the cost of the treatments for each window. So when you’re deciding on a budget for your treatments, be methodical. Guest bedrooms, laundry rooms, bathrooms, or any uncommon, informal areas in your home are good candidates for either blinds or curtains, not both—you likely don’t spend much time in these spaces, they don’t need to be the most styled part of your home and/or they don’t require a high level of privacy. Save the money on these areas and choose a treatment that gets the job done. On the other hand, living areas, formal dining rooms, and master bedrooms are places where a combination of both can add ultimate style, privacy, and temperature comfort, and it could be worth the money to invest in these high-impact areas.
Insulation
Sunlight can be a blessing and a curse for your home. It can fill living areas with wonderful natural light. It can liven up dining areas or kitchens. But, harsh sunlight can also heat up a room late in the afternoon, it can fade furniture, or it can wake you up too early on the weekends. When it comes to blocking out the sun, faux wood blinds and heavier curtains should be considered. Wood blinds or faux wood blinds block out a great deal of sun, but not all of it. If you want complete darkness to grab a few more winks on weekends, add some curtains over the binds to double up the sun defense. Consider the positioning of the windows throughout the house and protect the windows and rooms that bear the brunt of the sun, while making it easy for natural light to shine through when you want it.
When it comes to curtains and shades, there are a number of sun-blocking options. Cellular shades filter out the sunlight while still letting enough natural light into the room. Roman shades, sheer shades, and curtain fabrics all have different thicknesses, which block out different levels of UV rays and sunlight. If your living room faces west, you will certainly want some thicker shades to block out that evening sunshine and keep the temperature in the room manageable.
Style
Just about any style under the sun is available when it comes to choosing window treatments. Gone are the days when curtains were the only way to add style, warmth, and luxury to a room. Many options in shades and blinds can achieve the same effect.
Whichever you choose, you want the window treatments to accent the furniture in your room, not vice versa. For example, if your furniture is heavily patterned, choosing solid colors for blinds and curtains is the way to go. If your furniture is solid, light patterns and designs could accentuate certain colors or themes in the room. Keep theme and tone in mind: You wouldn’t choose earthy bamboo shades for a room with a sleek, industrial vibe, or beachy plantation shutters for a room with a modern artsy feel.
Choosing the proper window treatments for each room in your home comes down to a handful of factors. Don’t break the bank or overspend where you don’t need it, make sure you know where the sun is most intrusive in what rooms, and go with a style that fits the vibe of your home. Blinds and curtains can complete the look of a room, and make it feel like home.
Weatherizing your home: protecting your investment through the harsh winter months
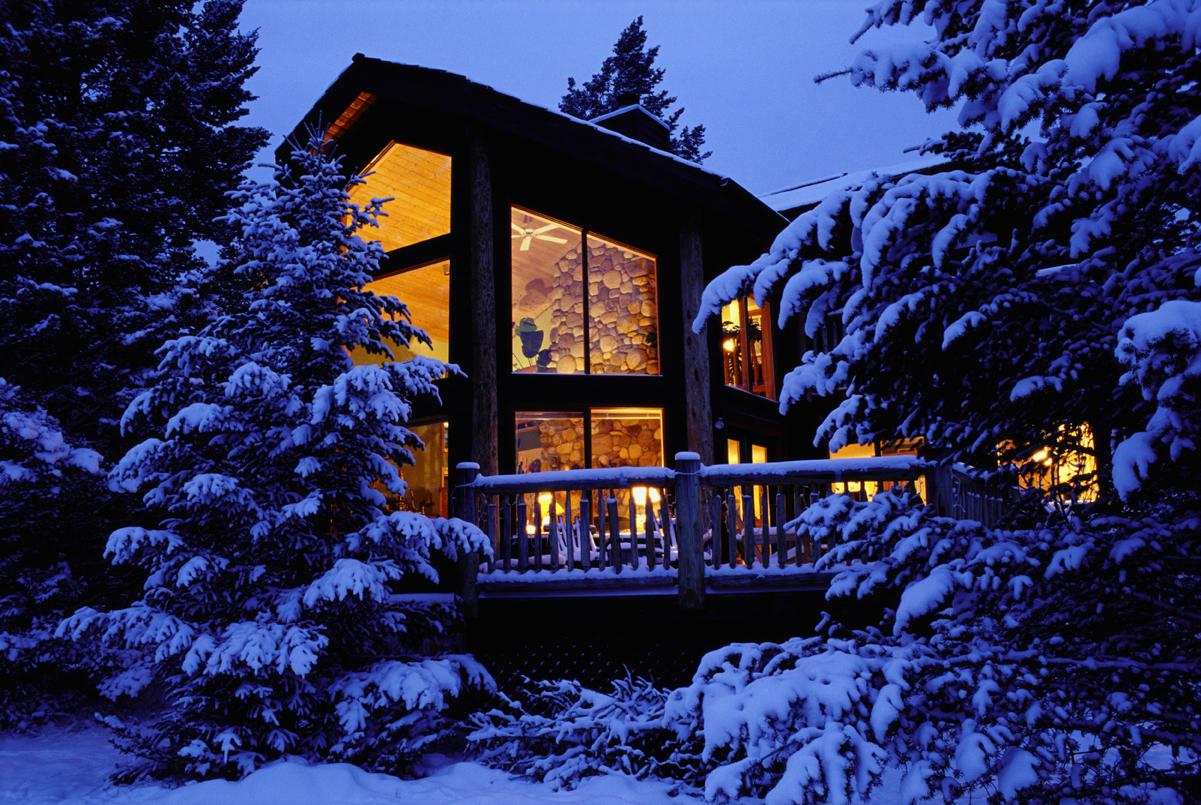
 It seems the winter is settling in early through much of the West Coast this year, with October frost and early winter warnings. Last week The Seattle Times reported, “This year will bring the most intense La Niña conditions since 1955 … Meteorologists say more rain, colder temperatures and bigger snowstorms are likely.” Whether the meteorologists are right this year or not, now is the time to do some home repair so you can enjoy the winter inside your warm house.
Weatherizing your home should be more than just packing in your patio furniture, checking your furnace and cleaning out your rain gutters, though these make a big difference in preparing your home and avoiding December disasters. Weatherizing your home–especially in light of harsh warnings–will protect your investment from preventable damage, save money on energy costs and, most importantly, keep your home safe and warm for you and your loved ones throughout the winter season. Here is a useful checklist to manage your weatherization project.
Getting started: Check your toolbox to make sure you have all the materials you need for home maintenance in one place. This NY Times article provides a good list of the tools you’ll really need to maintain your home. After your toolbox is put together, you can confidently begin the maintenance on your home.
Insulation: According to the Sustainable Energy Info Fact Sheet “Insulating a home can save 45-55% of heating and cooling energy”. For the best results, your home should be properly insulated from the ceilings to the basement. However, if insulating your complete home is not in your budget, the U.S. Department of Energy states, “one of the most cost-effective ways to make your home more comfortable year-round is to add insulation to your attic.” By starting in your attic and progressively adding insulation to other areas of your home over time, you will avoid spending a large sum of money up-front.
Cracks & Leaks: Do a run-through of your entire house for cracks and leaks, from your roof to your baseboards. Winter weather is unpredictable. Whether your area gets rain, wind or snow, cracks in your house can lead to cold drafts or leaks that cause water damage. Do-it-Yourself.com reports, “The average house, even when well-insulated, contains cracks and gaps between building materials that add up to a hole about 14 inches square. All year long, a leaky house not only wastes energy, but can lead to water damage and provide a path for insects”. Depending on your house type, most cracks can be easily filled with supplies from your local hardware store in a do-it-yourself fashion. Use caulk to seal any cracks in the permanent building materials.
Windows & Doors: Another common place for heat leakage is in your windows and exterior doorways. Make sure seals are tight and no leaks exist. If you have storm windows, make sure you put them on before the cold season begins. This 5 minute video, How to Caulk Windows & Doors, demonstrates how to find leaks, pick the correct tools to use, and fill in the leaks. Don’t underestimate the difference some weather strips and a door sweep can provide in preventing drafts and keeping the heat in.
Rain Gutters: Clean your rain gutters of any debris. Buildup will cause gutters to freeze with ice, crack and then leak. Once you have removed the residue from the drains, test them by running hose water to make sure cracks and leaks have not already formed.
Pipes: Pipes are a number one risk in winter climates. A burst pipe can become a winter disaster in a matter of seconds. Remember to turn off your exterior water source and take in your hose. Internally, wrapping your pipes is a recommended precaution to take. This article from Insights, Natural Hazard Mitigation advises, “Vulnerable pipes that are accessible should be fitted with insulated sleeves or wrappings, the more insulation the better”.
Heating System: What is one thing gas fireplaces, wood burning stoves, and central air heating systems all have in common? They all need to be cleaned and maintained. Check and clean your indoor heating system thoroughly. This is important to avoid dangers such as house fires. If you use an old fashioned wood stove, make sure there is no leaks and that all soot build up or nests are removed. If a furnace is what you have remember to change the filters as recommended or clean out your reusable filters.
Fireplace & Wood burning stoves: Make sure to have chimneys and air vents cleaned early in the season if you are planning on warming your home with a wood-burning source. When your fireplace is not in use make sure to close the damper, some resources estimate an open damper can increase energy consumption as much as 30%.
Outside: As we mentioned before make sure you bring your patio furniture inside (or cover) for the winter- but don’t forget other, smaller items such as your tools, including a hose and small planting pot. These items can be damaged or broken in extreme cold. Clear out any piles around the side of your house, checking for cracks as you go so to avoid providing shelter for unwelcomed guests over the cold season.
If your property has large trees check for loose branches and call someone to trim back any items that may fall in your yard, on your roof or even damage a window.
Emergency Kit: Make sure your emergency kit is up-to-date with provisions, batteries, fresh water, food for animals, entertainment for kids, etc- especially if you live in an area prone to power outages.
When it comes to protecting our investments and our families’ safety “an ounce of prevention is worth a pound of cure” is a good philosophy. Your winter preparedness plan will fit your property, schedule and needs. What are some tips you have for preparing for winter? What are some of your favorite activities to do at home over the winter while weathering out a storm?
By Brittany Lockwood
You may know Brittany as the helpful voice behind the Marketing Solutions Help Desk. She grew up in Cheney, Washington so she knows a thing or two about harsh winters.
